
Here goes:
I found this one off of another site (http://www.dwphotoshop.com/photoshop/embroidery.php) but didn't quite like the striations it created so I played around and found a twist to it. Plus they were making monograms and that wasn't my purpose either.
Let's start with a new document set for 4x4 inches (1200x1200pixels) at 300dpi. This will give us a good size if anyone should want to increase the letter later.
1. Pick the main color of your alpha for the foreground. Then pick a shade that is darker of lighter depending on your first color. Darker color should be set for background choice. I usually eyeball it and go directly below my color choice.
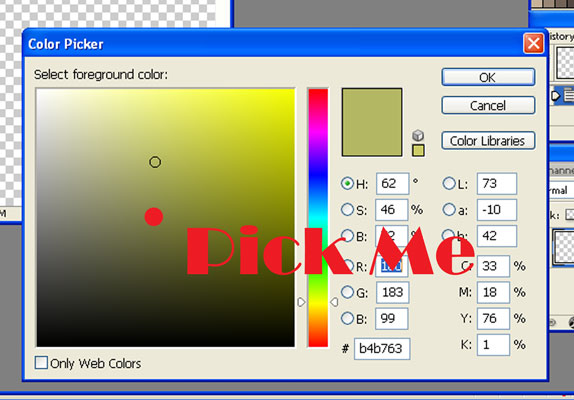
2. Click Ctrl + Backspace to flood fill with your darker color.
3. Click on your text tool (T) and select an alpha with large open areas so that you can see the effect more clearly. I am using Broadway at the moment. Type your letter and resize as necessary. I have this one at 180 pt.
4. Create a new layer above your text. Click on Alt + Backspace to flood fill with your foreground lighter color.
[IMG]http://i3.photobucket.com/albums/y67/frynsg/PSE%20Tutorial%20Screen%20Shots/EmbroidLayers.jpg[/IMG]
5. Go to Filter > Render > Fibers. Set it for Variance 14.0, Strength 50.0. But feel free to play around with these until you get a setting you like.
*Note: Don't worry about the pattern going vertical right now. We're going to alter that.
6. Go to Filter > Blur > Motion Blur. Set it for Angle 0, Distance 5.
7. Go to Edit > Transform > Rotate 90 CW. (For PSE users it would be Image > Rotate)
8. Ctrl Click on the alpha layer while keeping the top layer activated. This will highlight your letter shape onto your top layer.
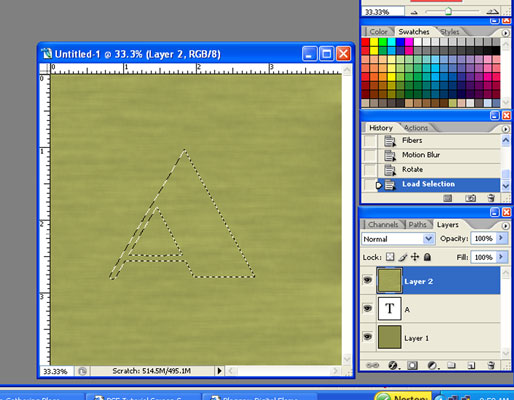
9. Click Ctrl + Shift + I (letter i) to select the inverse and then hit the Backspace key to delete everything except inside the letter shape. I like to click on Ctrl + Shift + I again to reselect the letter shape.
10. Click Ctrl + Shift + E (letter e) to merge all layers. Your letter will still have the marching ants around it. Don't deselect.
11. Click Ctrl + C, then Ctrl + N (new document in the exact size of your letter), and Ctrl + V. Now you have your embroidered letter on a transparent background to save as an individual png file.
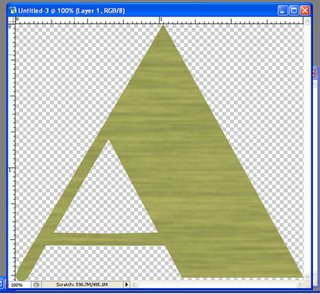
Now you are ready to add your favorite bevelling and drop shadows. Have fun!
4 comments:
Great tut!!
Can't wait to try this out!
What a wierd place to spam! LOL!
Loved the tutorial...keep on scrappin!
Slainte [Gaelic for Cheers!]
Catriona
catriona-macgregor.blogspot.com
Your article is very informative and helped me further.
Thanks, David
How long does the iPhone battery last before replacement? Like charge cycle wise, not time. Like I heard it was 300 charges then you need to send in for replacement? If it is 300, is it 300 FULL charges? As in your iPhone dies, and won't turn on because it has no battery? Or regardless any charges to the dock it counts?
________________
[url=http://unlockiphone22.com]unlock iphone[/url]
Post a Comment