When I was teaching Third Grade we always did this recyclable materials project since it went with the curriculum. We would often adopt the motto of 'Go Green' to cut down on paper waste and reuse materials. It's a great lesson for students to learn and I kind of missed that piece when I moved to Fourth.
But that shouldn't mean that students can't be exposed to the idea of recycling to help their environment, does it? This year, as I was printing out the directions for our Solar System project, I realized I could totally slip a little recycling in when it had never been before. I found the part in the parent instructions that told them not to think they had to spend a ton of money to recreate the planets and such and added in more suggestions about using recycled materials. I had crumpled up newspapers, bottle caps, and rolled up socks as ideas for making the solar system.
Some of my kids surprised me when they started complaining they didn't know how to create this project, or they didn't have anything recyclable at home. Are you kidding me??? We talked and discussed as a class and we heard from some of the those that had already started what they were finding to use in their projects.
The due date arrived for turning in this assignment and I was blown away. They really did an awesome job with this and reused a bunch of odds and ends to recreate the solar system. With a little forward thinking, we can all help save our planet, the third from the Sun.
Showing posts with label Tutorial. Show all posts
Monday, November 11, 2013
Tuesday, August 27, 2013
Thursday Tutorial - Google +1
I may be the only person on the planet that doesn't know what this means.
And it's driving me CRAZY!!
I had to figure it out before I end up as a quivering mass of gelatinous substance at the end of my keyboard.
From what I can glean from the internet information, it's basically a 'LIKE' button for your Google Profile. If you click the +1 tab, it will add it to your feed on your Goggle page so that all yourminions followers can have access to it.
Was it really that simple?
What are your thoughts on this Google +1 phenomenon? I see tons of people +1'ing my posts. Does this mean they are passing it on for their social media groups can see it too?
For that I thank you!
And it's driving me CRAZY!!
I had to figure it out before I end up as a quivering mass of gelatinous substance at the end of my keyboard.
From what I can glean from the internet information, it's basically a 'LIKE' button for your Google Profile. If you click the +1 tab, it will add it to your feed on your Goggle page so that all your
Was it really that simple?
What are your thoughts on this Google +1 phenomenon? I see tons of people +1'ing my posts. Does this mean they are passing it on for their social media groups can see it too?
For that I thank you!
Saturday, August 17, 2013
Thursday Tutorial - Remind101
I am finding tons of great resources this year. This one in particular is interesting to me. I had heard about it, but when Jivey showed me on her phone how it was to work, I was hooked.
This little app is a way for your parents to get text message reminders from you without letting them see your phone number. Think of the possibilities! Reminders about Curriculum Night coming up, report cards coming home, field trip money due, or projects that their kids forgot to tell them about. Oh, the happiness you could spread!
Remind101 has this to say about its purpose:
Teachers are busy. Our mission is to make tools that are simple to use, but highly effective. Signing up takes less than two minutes on the website, iPhone app or Android app, and it only takes seconds for students or parents to join a class. Safety is a primary feature: teachers never see students/parents phone numbers, nor will students/parents see theirs.
The connected classroom is rapidly evolving. Remind101 helps innovative teachers take advantage of technology in a way that frees up their time to focus on what they do best: teach.
Sounds like they are really thinking of how to best help teachers do their job. Gotta love that!
I signed up and clicked on the 'Create a New Class.' I was able to give my class a name and a unique code. Then Remind101 pops up a new screen like this:
It gives the parents a number and your special code to text to that number. Once they do that they are in and will receive any texts that you send to this group.
Our Curriculum Night, or the first parent teacher meeting, is tonight. I plan on sharing this with them and seeing how many sign up right there. It would be great if all of them do it, wouldn't it?
This little app is a way for your parents to get text message reminders from you without letting them see your phone number. Think of the possibilities! Reminders about Curriculum Night coming up, report cards coming home, field trip money due, or projects that their kids forgot to tell them about. Oh, the happiness you could spread!
Remind101 has this to say about its purpose:
Teachers are busy. Our mission is to make tools that are simple to use, but highly effective. Signing up takes less than two minutes on the website, iPhone app or Android app, and it only takes seconds for students or parents to join a class. Safety is a primary feature: teachers never see students/parents phone numbers, nor will students/parents see theirs.
The connected classroom is rapidly evolving. Remind101 helps innovative teachers take advantage of technology in a way that frees up their time to focus on what they do best: teach.
Sounds like they are really thinking of how to best help teachers do their job. Gotta love that!
I signed up and clicked on the 'Create a New Class.' I was able to give my class a name and a unique code. Then Remind101 pops up a new screen like this:
It gives the parents a number and your special code to text to that number. Once they do that they are in and will receive any texts that you send to this group.
Our Curriculum Night, or the first parent teacher meeting, is tonight. I plan on sharing this with them and seeing how many sign up right there. It would be great if all of them do it, wouldn't it?
Tuesday, August 13, 2013
Thursday Tutorial - TpT Widget
Have you seen the coolest new addition to my blog? It's over on the right hand sidebar. That awesome little roller that shows off some of my TpT products for the world to see? Ever since I spied it on Greg Smedley's blog, I had to have it. When I asked him about it his reply was the cryptic, "It's a widget from TpT."
Umm, er. I couldn't find anything like that right out in the open on the TpT website. I even tried to do a search through their help board with no luck. I just happened to accidently click on the right button and saw the html code just sitting there. Who'd I think of first? Of course! My brain was like, "What a perfect tut to share with my bloggy peeps!"
If you are interested in getting one from your TpT store to display on your blog, here are the steps:
1. Open your TpT store (mine is ScrappyGuy's TpT Store)
2. Over to the right you'll see the 'My TpT Store' button.
3. Click on that little flyout window and choose 'Dashboard'. It will take you to another screen.
4. Scroll down to the bottom and find the area for Marketing.
5. Click on second choice 'Link to my Store'. A new screen pops up with a choice to create a new widget. Click on the orange button.

6. It will take you through a series of choices for whether you want to display the Top Selling 25 items of your store, or the Most Recent items, then if you want a vertical or horizontal design.
7. Next you'll see a bunch of gobbledygook. If you are on Blogger, you are in luck. They've created a shortcut for us! SWEET!
Scroll all the way down to the bottom and you'll see this:
8. Give it a title and click next.
9. Done! It will appear on your blog for the world to oogle.
Now if you don't have Blogger you could try the next route.
7. When you see the gobbledygook, copy it all and bring it over to your blog. You'll need to get into your template design. Switch over to the Edit HTML format by clicking the button choice. You'll need to scroll through your code to find the line. I found mine underneath the 'Mobile' section. After you see the close bracket on the first line you can paste in that goobledygook you got from TpT.
8. Save your template and switch over to the layout. Select the Add a Gadget choice and look for the HTML. Go back to the TpT site and find the second line of HTML code listed.
9. Post that into the Add a Gadget HTML window and you'll see your new TpT widget lickety-split!
Fun Fun
Umm, er. I couldn't find anything like that right out in the open on the TpT website. I even tried to do a search through their help board with no luck. I just happened to accidently click on the right button and saw the html code just sitting there. Who'd I think of first? Of course! My brain was like, "What a perfect tut to share with my bloggy peeps!"
If you are interested in getting one from your TpT store to display on your blog, here are the steps:
1. Open your TpT store (mine is ScrappyGuy's TpT Store)
2. Over to the right you'll see the 'My TpT Store' button.
3. Click on that little flyout window and choose 'Dashboard'. It will take you to another screen.
4. Scroll down to the bottom and find the area for Marketing.
5. Click on second choice 'Link to my Store'. A new screen pops up with a choice to create a new widget. Click on the orange button.
6. It will take you through a series of choices for whether you want to display the Top Selling 25 items of your store, or the Most Recent items, then if you want a vertical or horizontal design.
7. Next you'll see a bunch of gobbledygook. If you are on Blogger, you are in luck. They've created a shortcut for us! SWEET!
Scroll all the way down to the bottom and you'll see this:
8. Give it a title and click next.
9. Done! It will appear on your blog for the world to oogle.
Now if you don't have Blogger you could try the next route.
7. When you see the gobbledygook, copy it all and bring it over to your blog. You'll need to get into your template design. Switch over to the Edit HTML format by clicking the button choice. You'll need to scroll through your code to find the line. I found mine underneath the 'Mobile' section. After you see the close bracket on the first line you can paste in that goobledygook you got from TpT.
8. Save your template and switch over to the layout. Select the Add a Gadget choice and look for the HTML. Go back to the TpT site and find the second line of HTML code listed.
9. Post that into the Add a Gadget HTML window and you'll see your new TpT widget lickety-split!
Fun Fun
Thursday, August 08, 2013
Thursday Tutorial - MS Word Picture Align
I was plugging away on my Common Core Wall Chart idea for Tpt and I started noticing a disturbing trend. Every time I would cut and paste an image to a new page it would place it in a completely weird spot. Well, that can't happen! Everything needs to be neat and pretty, right?
I needed to find out how to make sure that the slides were in the same place every time. I noticed on my toolbar were these two extra tabs called 'Drawing' and 'Picture' Tools that would pop up whenever I was working with a picture. So I clicked on the drawing one to see what it could offer towards a solution.
Over to the far right were these two cryptic numbers. After ogling the visual rectangles next to them for a bit, I realized that they were telling me the size of my image both its vertical height and horizontal width. Ahh, so now I know how to make sure that the image is always going to be the same size.
Also if you closely, you'll notice at the bottom right of this area is a tiny little fly-out triangle. If you click on that a new box appears like MAGIC! You can change the size proportions here as well. If you need to change it up without having both numbers change as if they were joined together, uncheck the 'Lock aspect ratio' box under 'Scale.'
Now click on the 'Layout' tab.
It's in here you'll find how to reposition your images on the page. Down at the bottom of this window is the 'Advanced' key. click on that and come to another menu. If you change the 'Horizontal' and 'Vertical' alignment choices over to Centered, your image will slide perfectly into the exact center of your page.
VOILA!
Thursday, August 01, 2013
Thursday Tutorial - Securing docs on Microsoft Word
My super newest friend has got to be Jessica Ivey, which I'm sure y'all know her better by Jivey. If you don't, she's cool. You'll like her.
Enough sucking up to my work colleague, let's get to the point of what this post is going to be about. I mentioned Jessica because in her uber-helpful section called Techy Tips she put out a post on how to secure your TpT products using pdf files. It's simple and straight forward, but something you definitely need to be careful with. If you are using other TpT sellers' products such as clipart or backgrounds, you need to check out that post. Most folks are stressing that you must 'secure' your materials if you are using their products. I will definitely be using Jessica's tips from here on out.
The big problem then is how to secure it so that folks can't just right click on an image such as those super cute super hero kids from Creative Clips and use them in Evil Pirate Ways. I don't want that to happen at all. I know how much hard work is put into these products, and to provide a way for some to take them without asking would make me feel horrible.
As I was creating my new Common Core product for teachers to display which standard they are working on, I started wondering if there was a way to secure documents in Microsoft Word. Lo' and behold, there is.
I found the answer on eHow. This is going to show you how to create a 'read only' file so folks will only be able to view and print out your document and not be able to click or alter anything you've included. I'm going to elaborate on that (read as 'with pictures') to share what I learned. Their process to secure Microsoft Word documents seems pretty easy, which I am thankful for. So let's get started.
1. Open the document you've created in Microsoft Word that you want to secure.
2. Click on the big Microsoft Office button.
Enough sucking up to my work colleague, let's get to the point of what this post is going to be about. I mentioned Jessica because in her uber-helpful section called Techy Tips she put out a post on how to secure your TpT products using pdf files. It's simple and straight forward, but something you definitely need to be careful with. If you are using other TpT sellers' products such as clipart or backgrounds, you need to check out that post. Most folks are stressing that you must 'secure' your materials if you are using their products. I will definitely be using Jessica's tips from here on out.
The big problem then is how to secure it so that folks can't just right click on an image such as those super cute super hero kids from Creative Clips and use them in Evil Pirate Ways. I don't want that to happen at all. I know how much hard work is put into these products, and to provide a way for some to take them without asking would make me feel horrible.
As I was creating my new Common Core product for teachers to display which standard they are working on, I started wondering if there was a way to secure documents in Microsoft Word. Lo' and behold, there is.
I found the answer on eHow. This is going to show you how to create a 'read only' file so folks will only be able to view and print out your document and not be able to click or alter anything you've included. I'm going to elaborate on that (read as 'with pictures') to share what I learned. Their process to secure Microsoft Word documents seems pretty easy, which I am thankful for. So let's get started.
1. Open the document you've created in Microsoft Word that you want to secure.
2. Click on the big Microsoft Office button.
And choose the 'Prepare' option right under Print.
3. Out of the options you have there is 'Mark as Final'. It will prevent users from editing the file
, as they will only be able to view and print it.
Hopefully this will thwart all of the Evil Piracy Lords and Ladies out there and will protect the amazing work on my fellow TpT sellers.
**Hindsight:
I sent Jessica a file made with this trick and sadly, she was still able to get into it after a simple click.
When you open it a window pops up that announces, "The author has locked this to discourage editing, are you sure you want to enable editing?"
Click... and she was in.
GRRR!
Back to the drawing board.
**Hindsight:
I sent Jessica a file made with this trick and sadly, she was still able to get into it after a simple click.
When you open it a window pops up that announces, "The author has locked this to discourage editing, are you sure you want to enable editing?"
Click... and she was in.
GRRR!
Back to the drawing board.
Thursday, July 25, 2013
Thursday Tutorial - Prezi
***HUGE DISCLAIMER: Prezi requires that your cell phone or tablet has Flash Player capabilities. Which apparently Android does NOT!! These presentations only work on iPhones and their tablets. Ug!
I often do things backwards. Like today's blog post, I am going back to the beginning of the Prezi tips and tutorials to find out how to set up an online presentation. This is after I struggled through creating my own for last week's QR code tutorial.
Prezi works off the same principals as Powerpoint. If you aren't familiar with that program, it is basically a slideshow that you can create that will run automatically through each slide or the viewer can click through using their keypad. You create each slide individually and add movements and even sounds and voice recordings if you like. Prezi is just a way to share it online.
What's really cool is that Prezi allows you to work simultaneously with others on the same slideshow. Think of the applications this could have for college students!
Once you sign in, there are actually tons of helpful videos that you can watch that help you get started on your presentation. There are a ton of 'metaphor' templates for you to choose from. Think about the information you are providing and then look over the templates to find one that matches it. Maybe your new blog creation was similar to climbing a mountain (I almost used the word 'like' in there. Big no no for metaphors). Choose your template and click on the slides over to the left to change the formatted information on each of the slides to match your own messages.
You can click anywhere on the original slide to add text and even place a youTube video using the controls at the top of the screen where it says 'insert.' Or you could bring over presentations you spent weeks creating in Powerpoint right into Prezi. Pretty cool.
You can add text boxes and remove others. You can change up the order of slides and make it your own. Moving the frames around on the template is as easy as clicking and holding then pulling it to where you want it to be. Adding images and new frames is done through the controls at the top under 'Frames and Arrows' and 'Insert' where you can maneuver through your files to find images you might have saved there.
Once you are ready to share with others, click on the 'Present Online' option and copy that link to give to others. I made the mistake of copying the URL from the 'Share' feature and it wouldn't let people in to see the slideshow. So both of my QR codes had to be redone. Bummer.
But it seems I wasn't too far off the mark for creating my own Prezi online presentation. I guess it was more self-explanatory than I thought. My biggest problem was that I couldn't figure out how to get down to each individual slide to add information. I kept clicking on the original slide, but it wouldn't come up. Then I realized I had to click on the separate slides over to the left to change the information.
I still have a few questions though.
*How can I copy and paste an entire frame?
*How do I make sure that the text, such as subtitle, are exactly the same size. They only had the bigger and smaller keys and you can pull out the frames to enlarge the text size, but who knows if you pull out every text size to the same?
If you are interested in joining Prezi, use this Referral Link and tell them ScrappyGuy sent ya!
I often do things backwards. Like today's blog post, I am going back to the beginning of the Prezi tips and tutorials to find out how to set up an online presentation. This is after I struggled through creating my own for last week's QR code tutorial.
Prezi works off the same principals as Powerpoint. If you aren't familiar with that program, it is basically a slideshow that you can create that will run automatically through each slide or the viewer can click through using their keypad. You create each slide individually and add movements and even sounds and voice recordings if you like. Prezi is just a way to share it online.
What's really cool is that Prezi allows you to work simultaneously with others on the same slideshow. Think of the applications this could have for college students!
Once you sign in, there are actually tons of helpful videos that you can watch that help you get started on your presentation. There are a ton of 'metaphor' templates for you to choose from. Think about the information you are providing and then look over the templates to find one that matches it. Maybe your new blog creation was similar to climbing a mountain (I almost used the word 'like' in there. Big no no for metaphors). Choose your template and click on the slides over to the left to change the formatted information on each of the slides to match your own messages.
You can click anywhere on the original slide to add text and even place a youTube video using the controls at the top of the screen where it says 'insert.' Or you could bring over presentations you spent weeks creating in Powerpoint right into Prezi. Pretty cool.
You can add text boxes and remove others. You can change up the order of slides and make it your own. Moving the frames around on the template is as easy as clicking and holding then pulling it to where you want it to be. Adding images and new frames is done through the controls at the top under 'Frames and Arrows' and 'Insert' where you can maneuver through your files to find images you might have saved there.
Once you are ready to share with others, click on the 'Present Online' option and copy that link to give to others. I made the mistake of copying the URL from the 'Share' feature and it wouldn't let people in to see the slideshow. So both of my QR codes had to be redone. Bummer.
But it seems I wasn't too far off the mark for creating my own Prezi online presentation. I guess it was more self-explanatory than I thought. My biggest problem was that I couldn't figure out how to get down to each individual slide to add information. I kept clicking on the original slide, but it wouldn't come up. Then I realized I had to click on the separate slides over to the left to change the information.
I still have a few questions though.
*How can I copy and paste an entire frame?
*How do I make sure that the text, such as subtitle, are exactly the same size. They only had the bigger and smaller keys and you can pull out the frames to enlarge the text size, but who knows if you pull out every text size to the same?
If you are interested in joining Prezi, use this Referral Link and tell them ScrappyGuy sent ya!
Thursday, July 18, 2013
Thursday Tutorial - QR codes 2
As promised, I am back with my completed parent letter to hand out during registration. Which, by the way, will occur in exactly 2 weeks, 3 days, and 22 hours (sigh). Using QR codes seems to be the easy part. The hardest thing about the process seemed to be where to store the information that I wanted parents to be pointed at when they read the QR code.
I did up some presentations using Prezi which was not self explanatory. I fumbled around a bit in there without watching any of their suggested tutorial videos or tips and tricks. Maybe I should have started there, eh? Anyway, be on the lookout for a Thursday Tut about this online tool. By the end I had two slideshows that parents could go through to discover a little bit more information about me and things that will occur in Fourth Grade this year. One was just information based, the other was how to create their own binder covers.
I bought 2" binders for my students to put all of their work in this year. I simply despise spiral bound notebooks and how messy they become so fast. I hate those metal spires that poke out every which way. And I simply detest trying to wrangle a stuck pencil out from the spine while trying to teach. Ugh! Last year I tried using a 1" binder, but found that we were constantly removing information such as Social Studies units from there to put somewhere else. There simply wasn't enough room. Hopefully the 2" binder will save us the trouble of doing that.
Here are the two QR codes I created using QR Stuff and you can try them out for me to see if there are any bugs before I present them to parents. (Thanks for the help!)
I am also including the editable parent letter I am handing out during our school's registration. Feel free to grab that and make it your own.
Parent Letter with QR codes
There you have it. QR codes made simple. I had an update from Ideas by Jivey that it doesn't look as if our school will be receiving any class sets of tablets with camera and internet access soon. But I'm hoping that enough parents have a smartphone with data plans that we can make use of this fun resource!
Let me know if you have any questions and I will try to figure them out. See you soon.
I did up some presentations using Prezi which was not self explanatory. I fumbled around a bit in there without watching any of their suggested tutorial videos or tips and tricks. Maybe I should have started there, eh? Anyway, be on the lookout for a Thursday Tut about this online tool. By the end I had two slideshows that parents could go through to discover a little bit more information about me and things that will occur in Fourth Grade this year. One was just information based, the other was how to create their own binder covers.
I bought 2" binders for my students to put all of their work in this year. I simply despise spiral bound notebooks and how messy they become so fast. I hate those metal spires that poke out every which way. And I simply detest trying to wrangle a stuck pencil out from the spine while trying to teach. Ugh! Last year I tried using a 1" binder, but found that we were constantly removing information such as Social Studies units from there to put somewhere else. There simply wasn't enough room. Hopefully the 2" binder will save us the trouble of doing that.
Here are the two QR codes I created using QR Stuff and you can try them out for me to see if there are any bugs before I present them to parents. (Thanks for the help!)
I am also including the editable parent letter I am handing out during our school's registration. Feel free to grab that and make it your own.
Parent Letter with QR codes
There you have it. QR codes made simple. I had an update from Ideas by Jivey that it doesn't look as if our school will be receiving any class sets of tablets with camera and internet access soon. But I'm hoping that enough parents have a smartphone with data plans that we can make use of this fun resource!
Let me know if you have any questions and I will try to figure them out. See you soon.
Thursday, July 11, 2013
Thursday Tutorial - QR Codes
Hello again,
I found something I've been meaning to figure out for myself and now have some time to focus on it. There has been rumors at our school about the coming of TABLETS. This idea opens up a whole different can of worms as to the logistics of using them in a classroom. That journey is going to take a while to implement.
One thing that I've noticed tons of teachers who are already using tablets mention in their lessons is the use of QR CODES, or quick response codes. A QR code is "a specific matrix bar code ( or two-dimensional code ), readable by dedicated QR bar code readers and camera phones. The code consists of black modules arranged in a square pattern on a white background. The information encoded can be text, URL, or other data." Now, I've seen those weird looking squares all over the place and have no idea what they do. They're on the bus, at the movies, on the table tents in restaurants, and even on candy bars. I think it's time I figure out these little buggers.
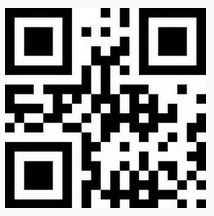
Here's a picture of one:
This one has to do with Altrex range of aluminium access towers and access to a user manual. Umm, o-kay.
So, how are they useful for students to use on an iPad?
I raced over to Google - again - and searched for how to use qr codes on worksheets. They had an amazing suggestions on the first site that popped up. Can you imagine sending kids home with a math worksheet that has a qr code the students can read on their parents smartphone that will lead them right to a video tutorial about the main points in the lesson. For real?
In order to create and use these on your worksheets, you are going to need a few things. You'll need a qr code, a qr reader program with an internet connection, and a site to send them to. Thankfully all of this is free. There's a site called QR Stuff where you go through three very easy steps (type of data, url info, and color choice) before you are presented with your very own downloadable qr code.
You can download several different qr readers for either iPad or Android devices. I just downloaded one called QR Droid, such an inventive name!
Here's the rub, you need to decide how to use your qr code. What information do you want to present and how do you want to deliver the information? Do you want your students to access a short youTube video that goes back over the pertinent info regarding simple subjects, or do you want a homework cheat sheet that students can read back over to remind them what you taught earlier. Once you've uploaded your instructional tool, copy the url and use it to create your very own qr code.
Angie Sigmon over at iPads in School came up with an amazing interactive way for her Open House. She was able to get 30 iPads for her classroom and had one out on each student's desk. They went around on a scavenger hunt to find out information about their new teacher and things they will need for the year. This sounds so amazing. I wonder if I can use one Samsung Galaxy tablet in the same way.
I'm going to have to play around with this a little longer and create a classroom hunt on my own. So stay tuned next week when I share my results!
I found something I've been meaning to figure out for myself and now have some time to focus on it. There has been rumors at our school about the coming of TABLETS. This idea opens up a whole different can of worms as to the logistics of using them in a classroom. That journey is going to take a while to implement.
One thing that I've noticed tons of teachers who are already using tablets mention in their lessons is the use of QR CODES, or quick response codes. A QR code is "a specific matrix bar code ( or two-dimensional code ), readable by dedicated QR bar code readers and camera phones. The code consists of black modules arranged in a square pattern on a white background. The information encoded can be text, URL, or other data." Now, I've seen those weird looking squares all over the place and have no idea what they do. They're on the bus, at the movies, on the table tents in restaurants, and even on candy bars. I think it's time I figure out these little buggers.
Here's a picture of one:
This one has to do with Altrex range of aluminium access towers and access to a user manual. Umm, o-kay.
So, how are they useful for students to use on an iPad?
I raced over to Google - again - and searched for how to use qr codes on worksheets. They had an amazing suggestions on the first site that popped up. Can you imagine sending kids home with a math worksheet that has a qr code the students can read on their parents smartphone that will lead them right to a video tutorial about the main points in the lesson. For real?
In order to create and use these on your worksheets, you are going to need a few things. You'll need a qr code, a qr reader program with an internet connection, and a site to send them to. Thankfully all of this is free. There's a site called QR Stuff where you go through three very easy steps (type of data, url info, and color choice) before you are presented with your very own downloadable qr code.
You can download several different qr readers for either iPad or Android devices. I just downloaded one called QR Droid, such an inventive name!
Here's the rub, you need to decide how to use your qr code. What information do you want to present and how do you want to deliver the information? Do you want your students to access a short youTube video that goes back over the pertinent info regarding simple subjects, or do you want a homework cheat sheet that students can read back over to remind them what you taught earlier. Once you've uploaded your instructional tool, copy the url and use it to create your very own qr code.
Angie Sigmon over at iPads in School came up with an amazing interactive way for her Open House. She was able to get 30 iPads for her classroom and had one out on each student's desk. They went around on a scavenger hunt to find out information about their new teacher and things they will need for the year. This sounds so amazing. I wonder if I can use one Samsung Galaxy tablet in the same way.
I'm going to have to play around with this a little longer and create a classroom hunt on my own. So stay tuned next week when I share my results!
Thursday, July 04, 2013
Thursday Tutorials - Linky Party
Happy Independence Day y'all!
I heard the history of this day put into perspective by my niece's FB status this morning:
5. Give it a duration of time that you'd like it to run:
6. Then set up the information for how you want the links to display:
(here I am going to go with the suggestions provided by It's a Blog Party
since they seem to know what they are doing).
7. Finally, you have the option to be emailed when someone links up. This way you can check for spammers and such to delete that mess right away. Also, if you are going to repeat this type of collection again in the future and want to save the settings, create a "Meme" name for it and it will show up under the "Add new based on" pull down at the beginning of your dashboard. Save yourself some time.
SUBMIT!
8. You'll get this gobbledy-gook HTML code that you can include in your post. When you're ready to start the Linky Party, create a new post and go through the motions of explaining it all to your loyal readers. Then when you are ready to include the Inlinkz information (usually at the end of your post) you can switch the post content "Compose" to "HTML". I see it sitting at the top left of the screen underneath the Blogger icon and my blog name. Once in HTML, just insert the Inlinkz HTML code you saved earlier at the end.
9. Preview your blog to see the actual link box happening to see if it all looks perfect.
10. Then you are ready to publish your first Linky Party.
I really hope this was helpful. If you have any questions, please feel free to leave me a comment or email me (that icon is at the top of the page in the far right corner, just click on the little envelope icon).
Stay tuned tomorrow when I release my first ever LINKY PARTY! Hope to see you there.
I heard the history of this day put into perspective by my niece's FB status this morning:
"Okay guys, one more thing, this summer when you're being inundated with all this American bicentennial Fourth Of July brouhaha, don't forget what you're celebrating, and that's the fact that a bunch of slave-owning, aristocratic, white males didn't want to pay their taxes." ;)
She's so cute. Love that she used the word brouhaha, it's such a throwback to seventh grade English class with Ms. McGovern.
Today I thought I'd focus on providing a little tutorial. This is going to focus strictly on technology and not specifically for use in your classroom. Once I got the idea settled I had to think what I wanted to share on this day of Independence. The problem I've been trying to solve in the past few days for myself was the mysterious phenomenon known as a "Linky Party." A ton of the blogs I've been visiting through the TpT community seem to have conquered this strange method of binding themselves together into a tight knit group.
Never wanting to be left out of the loop, I want to decipher the code that surrounds the Cool Group. As I struggle to get it working for my blog, you are coming along with me for the ride. Are you ready? Got a cool drink and a cookie? Let's go!
1. The first thing I always do when trying to create something is to head over to Google. So I typed in: How do I create a linky party. The first site it took me to was It's a Blog Party that claims to know the secrets behind linkies in the post "Building your Blog: Host a Linky Party." We shall see.
2. One of the things you definitely need in order to host a linky party is a 'button.' This is a little image that acts as a link back to your blog. You can see mine off to the right under the Grab My Button heading. You can add this to your Blogger site by adding the gadget HTML to your blog and sticking the code you see under my button into the gadget box. Just make sure that you change the information between the parenthesis over from my blog site to yours and then change the information between the second set of parenthesis from my image location to yours.
You'll have to load your image up to a separate sharing site such as Photobucket and grab the direct code from that site in order to plug into the HTML code above.
3. Next you'll need to build your own linky platform. There are two choices that I looked into Inlinkz and Linky Tools. Both are free to join, but if you want the real benefit from the program, you'll need to pay about $2 a month for the upgrade. YES! There's money involved. Just wanted you to be aware of this before we move forward.
I think I'm going to go with Inlinkz. Their website just looks cleaner and they offer a discount of $20 for the year if you pay at once. Save yourself $4 for some Starbucks, right? Once you are all logged in and confirmed your subscriptions through your email (there will be two, one for newsletter and one for the site itself, make sure you confirm both or it won't let you log in) you'll have two choices: Go to Dashboard, or Project Manager.
Your first Linky Party with thumbnail images is totally free. After that you are allowed text only Linky Parties. If you want thumbnails (much more fun for me) you'll need to change your subscription over to the paid service. Let's do that first. Click on "Account" at the top and click on the blue "Extend your Plan" button next to link-up tool subscription. You'll see payment options there. I chose the $19.99 for one year - save 18% option and paid it off.
If anyone also wants to join this site, here is My Referral Number
4. Now you're ready to start your very own Linky Party, or "Collection" as Inlinkz calls them. Click on the "Create New Collections" button and give your Linky Party a name.
5. Give it a duration of time that you'd like it to run:
6. Then set up the information for how you want the links to display:
(here I am going to go with the suggestions provided by It's a Blog Party
since they seem to know what they are doing).
7. Finally, you have the option to be emailed when someone links up. This way you can check for spammers and such to delete that mess right away. Also, if you are going to repeat this type of collection again in the future and want to save the settings, create a "Meme" name for it and it will show up under the "Add new based on" pull down at the beginning of your dashboard. Save yourself some time.
SUBMIT!
8. You'll get this gobbledy-gook HTML code that you can include in your post. When you're ready to start the Linky Party, create a new post and go through the motions of explaining it all to your loyal readers. Then when you are ready to include the Inlinkz information (usually at the end of your post) you can switch the post content "Compose" to "HTML". I see it sitting at the top left of the screen underneath the Blogger icon and my blog name. Once in HTML, just insert the Inlinkz HTML code you saved earlier at the end.
9. Preview your blog to see the actual link box happening to see if it all looks perfect.
10. Then you are ready to publish your first Linky Party.
I really hope this was helpful. If you have any questions, please feel free to leave me a comment or email me (that icon is at the top of the page in the far right corner, just click on the little envelope icon).
Stay tuned tomorrow when I release my first ever LINKY PARTY! Hope to see you there.
Subscribe to:
Posts (Atom)